10 Days of Thanksgiving Crochet Event 2019
It's crazy how fast 2019 has flown by us! This year has been a crazy one full of changes for me and I'm excited to be able to still participate in the 10 Days of Thanksgiving Event. The past couple of years have been fun sharing my thoughts with you and hearing about things you're thankful for too. It's even better having some great crochet designer friends to enjoy putting this event together for you. I want to give a HUGE shout out and thank you to Heidi from Snappy Tots, Kristine from Ambassador Crochet and Christine from Sweet Potato 3 Patterns for being great friends and easy to work with.
Keep reading to find out how this event works and how to enter to win crochet patterns
18 Comments
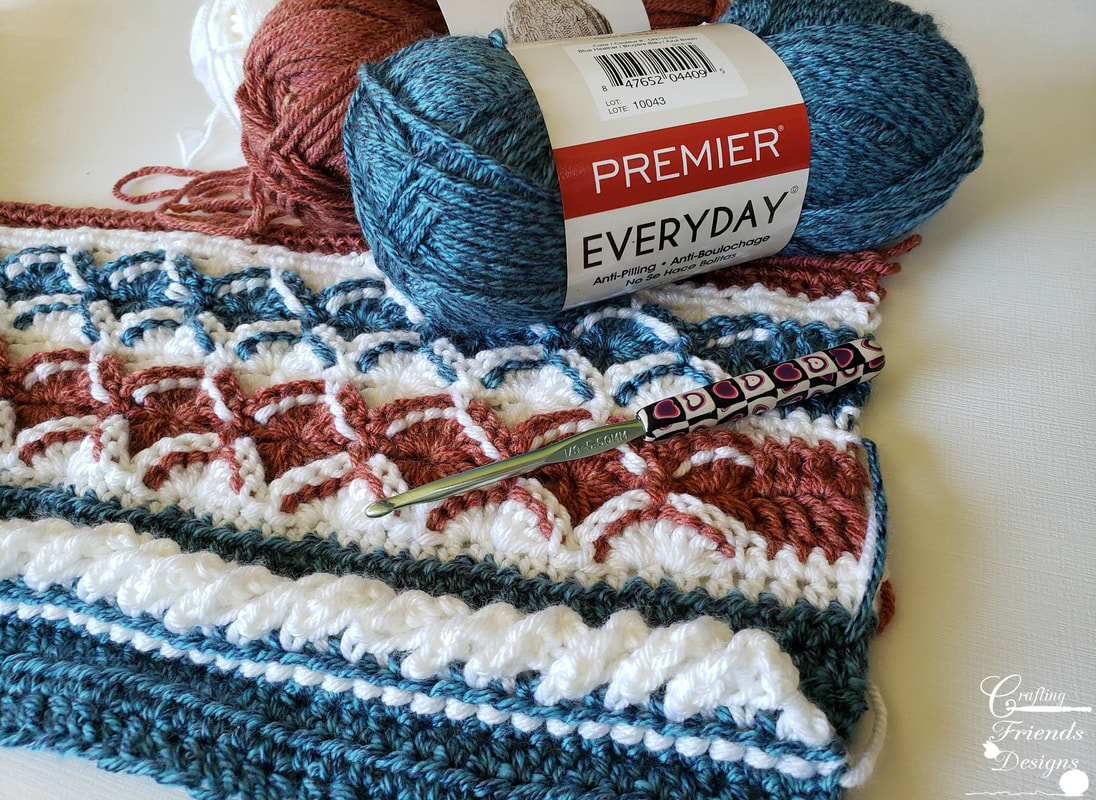
 Puff Quilt Floor Blanket Crochet Pattern Crochet project ideas that take time to decide if you like them or not...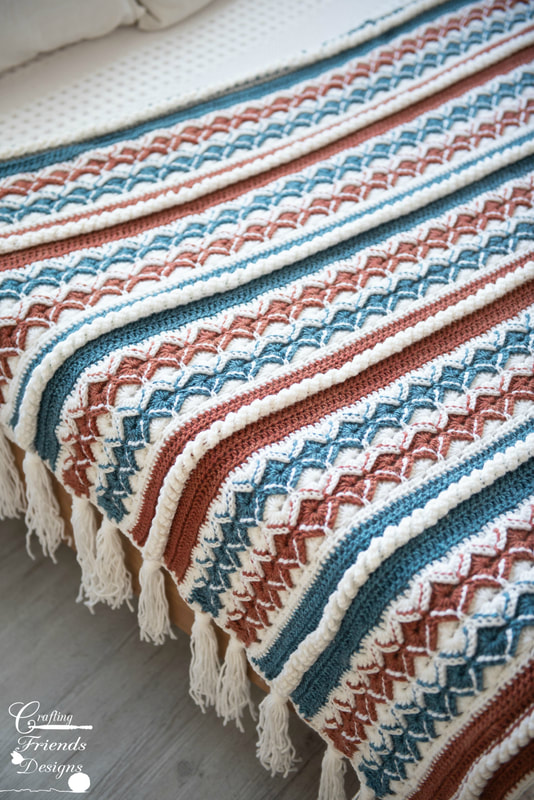 Wonderful new textured crochet blanket patternFor years, I have absolutely loved the look of the various wheel stitches. Using color to play up the texture brings an amazing accent to any room. Fringe has always been a fun touch to those blankets that are placed across couches or bed. They give that extra feeling of "Hey, Look at me!" This Ropes and Wheels Blanket would be stunning in a single color and is wonderful in many. Crochet Pattern Details Skill Level: Intermediate Terms: US Crochet Terminology Materials: 4ww yarn such as Premier Yarns Everyday yarn or similar 790 yards Blue Heather (main blanket) 1363 yards Snow White (main blanket) 790 yards Terracotta Heather (main blanket) 192 yards Snow White (for fringe only) Finished Size: 47” x 70” or customize Hook: I/9-5.50mm Gauge: 7 sc & 9 rows = 2” Stitches/Abbreviations: st(s) - stitch(es), sl st - slip stitch, ch - chain, yo - yarn over, sc - single crochet, hdc - half double crochet, dc - double crochet, tr - treble crochet Special Stitches: Hdc Foundation Chain: If you’re unfamiliar with foundation chains, these tutorials may help Photo: http://craftingfriendsdesigns.blogspot.com/2014/12/hdc-chainless-foundation.html Video: https://www.craftingfriendsdesigns.com/bloggingfun/hdc-foundation-chain-video-tutorial Front Post Single Crochet (FPsc): Insert hook from front to back to front around post of indicated stitch, yo, pull loop through, yo, pull through both loops on hook 4 Back Post Double Crochet Cluster (4BPdcCL): [Yo, insert hook from back to front to back around next dc, yo, pull up a loop, yo, pull through 2 loops on hook]4x, yo, pull through all 5 loops on hook, ch 1 Back Post Double Crochet Cluster (BPdcCL): [Yo, insert hook from back to front to back around next dc, yo, pull up a loop, yo, pull through 2 loops on hook]8x, yo, pull through all 9 loops on hook, ch 1 Beginning Standing stitches: These stitches are used to start each row in place of a turning chain. If you are unfamiliar with working these stitches, you can find a video tutorial here: http://jessieathome.com/crochet-techniques-chainless-row-turns-sc-hdc-dc/ Note: If you prefer to use turning chains, chain the amount needed for the first stitch height and then work a regular sc, hdc or dc in the very first stitch as written. Do not use the chain as a stitch. Notes: This pattern uses standing stitches to begin each row Photos showing stitch placement are on the last page of pattern and are referenced as P1, P2, P3 etc. When changing colors, do so in the last step of the last stitch of the row before the color change (c) 2019 Copyright by Kate Wagstaff of Crafting Friends Designs (c) 2019 Photo Copyright by Ash & Co It is ILLEGAL to copy, share or upload this pattern to sites for others to access. You are welcome to sell the finished items you crochet using this pattern.
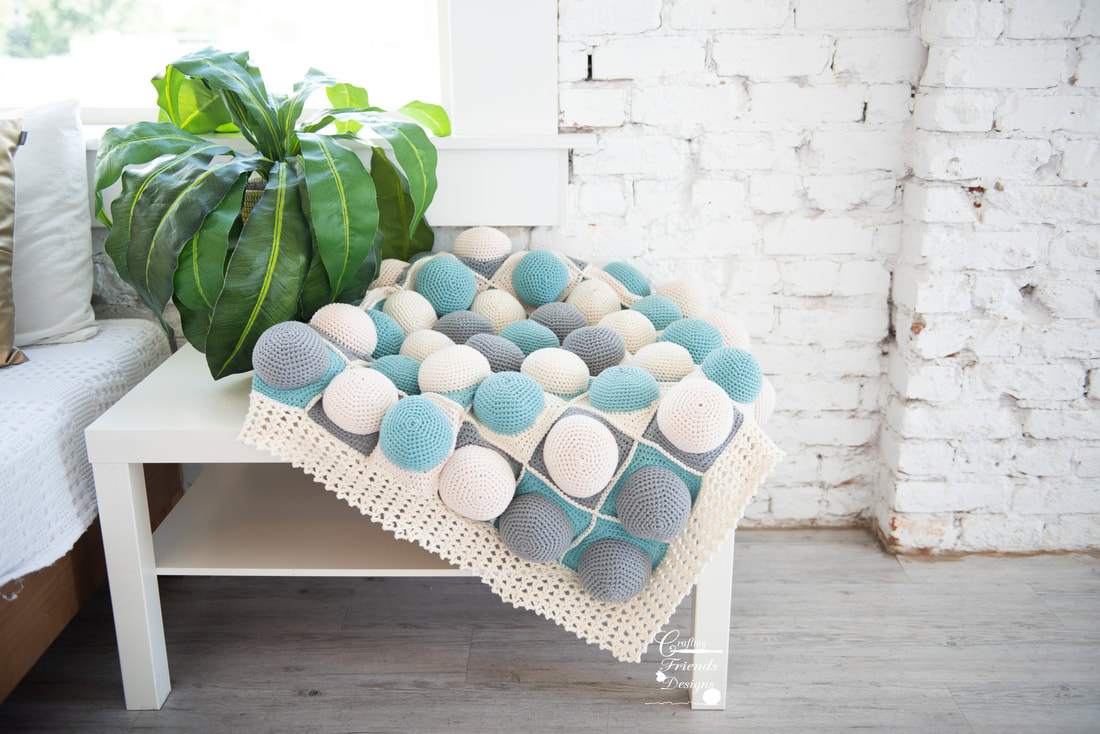
 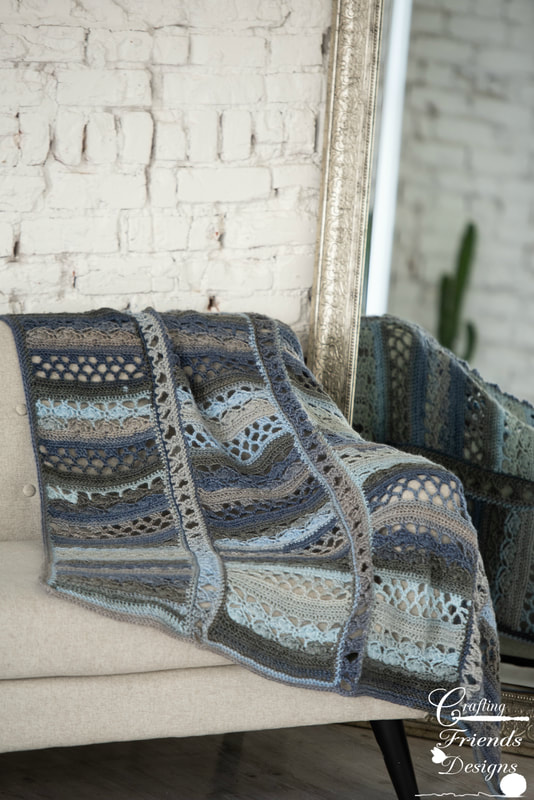 Crochet pattern details:Clouded Skies Blanket crochet pattern ~ Worked in strips and stitched together with a pretty butterfly chain. This pattern is available on Bluprint as a kit with the yarn included Skill Level: Easy Terms: US Crochet Terminology Materials: 1900 yards Sprightly Spectrum 4ww yarn or similar 16 stitch markers, safety pins or strands of yarn to mark corner stitches of each section Finished Size: 48” x 60” Hook: J/10-6.00mm Gauge: Rows 1-15 = 7” high x 10” wide Stitches/Abbreviations: st(s) - stitch(es), sl st - slip stitch, ch - chain, yo - yarn over, hdc - half double crochet, dc - double crochet Special Stitches: Hdc Foundation Chain: If you’re unfamiliar with how to work foundation chains, this photo tutorial may help: http://craftingfriendsdesigns.blogspot.com/2014/12/hdc-ch... Or a video tutorial is available here: https://www.craftingfriendsdesigns.com/bloggingfun/hdc-fo... Herringbone hdc: Yo, insert hook in indicated st, yo, pull up a loop, pull through 1 loop on hook, yo, Pull through both loops on hook 2 dcCL: yo, insert hook in indicated st, yo, pull up a loop, yo, pull through 2 loops on hook2x, yo, pull through all 3 loops on hook 3 dcCL: yo, insert hook in indicated st, yo, pull up a loop, yo, pull through 2 loops on hook3x, yo, pull through all 4 loops on hook Clouded Skies Blanket crochet pattern available in the following places:Are you ready for a new and unique square blanket crochet pattern?So, here's the deal... ANYONE can take a simple stitch out of a crochet stitch book, make a large swatch of it, call it a blanket and say they designed it. To me, it's not really designing unless you do something extra. Make it unique to you and change things up a little or a lot. If you've followed me very long, you know that I am obsessed with blankets. I absolutely LOVE them! I love creating them, crocheting them, wrapping up in them and gifting them! I have a few simple blanket patterns available that use basic stitches and they're nice to have around. When I see them, they seem comfy and useful but don't bring me joy. I love the challenge of using a variety of stitches that you don't typically see worked together. I want that Ahhh moment when I crochet something amazing. More than that, I want YOU to feel that AHHH moment when you finish crocheting one of my blanket patterns. I want YOU to feel accomplished and feel the joy each time you wrap up in the blanket you made or see the look on a friend's face when they open the gift you made especially for them. **This post contains Affiliate links. I may receive a small commission for purchases made through these links at no extra cost to you.** I've wanted to create a square blanket for quite a while now. I just needed the right yarn/color inspiration and some stitches to speak to me. Months ago, I was strolling the yarn isles at my local JoAnn's store and they had Premier Yarn's Everyday yarn for $2 a skein. I could NOT pass that deal up!!! I filled my cart with some amazing fall colors that I wanted to work and then noticed some baby yarn too. It's been years since I've worked with baby yarn and for this price, I figured I'd bring something to life. I grabbed all the grey, white and pink they had. THIS was going to be adorable no matter how it ended. As I started crocheting my first swatch with these colors, I realized that the pink was a 4ww and not the baby yarn. Darn it! I should have paid attention though I won't complain about another yarn shopping day lol. I set the pink aside for something else and ordered the yellow online. I am thrilled with the change! The Sunny Day Blanket has been a lot of fun to crochet and I've really enjoyed playing with a bunch of beautiful textured stitches . I hope that you'll have fun crocheting this along with me! This is a great blanket to play with color so grab your stash and make it yours. The original is worked in Premier Everyday Baby Yarn #3 in yellow, grey and white. I'm working a 2nd blanket to crochet with you during this Crochet - A - Long using Premier Everyday Antipilling #4ww Yarn in rainbow colors.
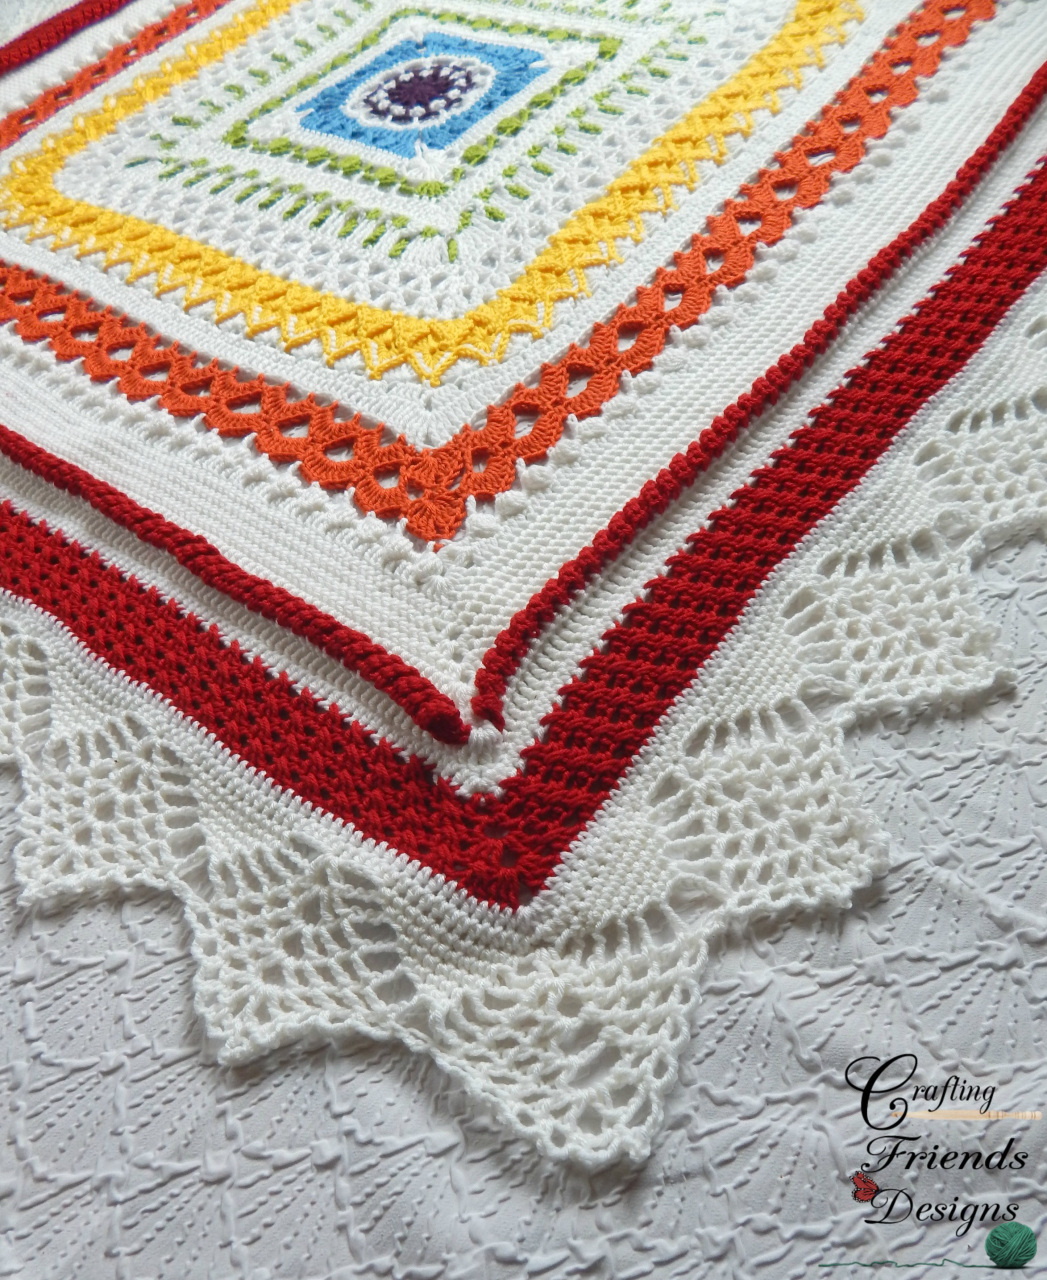
Sunny Day Blanket DetailsSkill Level: Intermediate
Terms: US Crochet Terminology Materials: 2455 total yards Premier Yarns Everyday Baby #3 DK Light or similar 735 yards Grey 742 yards White 978 yards Yellow Note: Other sizes of yarn may be used though your final size will vary Finished Size: 53” x 53” Hook: G/6-4.25mm Gauge: Checkpoints given throughout pattern Stitches/Abbreviations: st(s) - stitch(es) sl st - slip stitch ch - chain yo - yarn over sc - single crochet hdc - half double crochet dc - double crochet tr - treble crochet Get ready for a New Corner to Corner style crochet pattern!
When I was young, my grandma was amazing at crochet and always had something in the works. She crocheted an afghan for all of her grandkids with one exception. Me! You see, I learned to crochet when I was 10 years old and crocheted SO many blankets by the time I was 20. One day I asked my grandma when she was going to make me an afghan and my silly grandma kind of laughed and said I could make my own. She wasn't trying to be mean. I think in her mind, she thought I wouldn't need another blanket because I was making so many. Well, I didn't NEED another blanket but I DID want something she crocheted to always have and hold and love and appreciate because of who she is. While we were standing in her living room, she decided I could have an afghan that she had made for a friend (another silly lady!). This friend wouldn't accept the blanket because it was "to nice and so much work." The blanket was placed across my grandma's couch and I happily accepted it as a keepsake.
Spring ahead a few months to our family reunion. For many years, grandma would crochet an afghan to be raffled off at our family reunions to help cover the cost of food for the next year's party. Wouldn't you know it, I WON another afghan in this raffle!! Woot Woot!!! I now have 2 blankets made by grandma. I was so excited because now I could tuck one away for safe keeping and use the 2nd one to snuggle in. While grandma never submitted any patterns to magazines, she was always tinkering with crochet stitches and coming up with her own creations. The blanket I won in the raffle was worked in a corner to corner style. I asked her for the pattern thinking it would be fun to make another one some day. She giggled and told me there wasn't a pattern because she just made it up as she went. She amazed me! Because of her, I had the courage to test the waters and come up with my own corner to corner style blanket.
Years later, my sister had a baby boy and named him Hunter. His dad likes to hunt a lot and another sister helped paint a fantastic nature scene on the wall in his nursery. This is when I came up with the Camo Afghan crochet pattern. I wanted to make it in the corner to corner style and also wanted it to seem natural in his room. The camo effect wasn't intentional but worked out well for what I wanted.
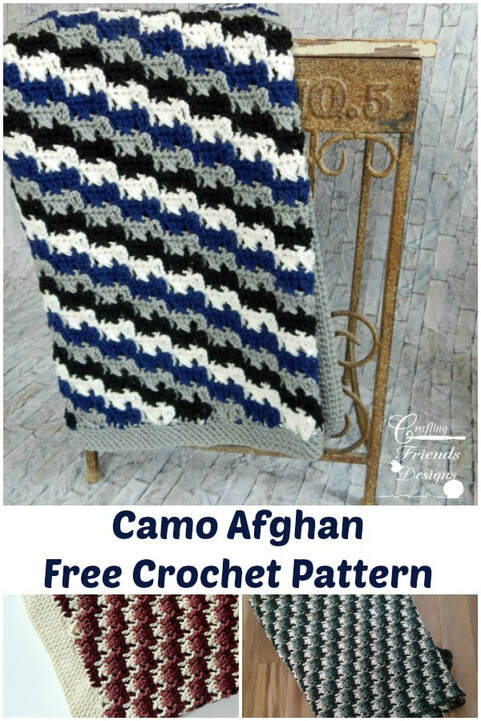
Pin This
The Camo Afghan crochet pattern has 2 different versions.
The first (original ~ green or pink) version is worked from right to left and fastened off at the end of each row. Not only is this fun to work in camo colors but would be a PERFECT option for using up scrap yarn stashes, Rainbow colors or temperature blankets! Instructions for the original version are available to view for FREE by continuing below. The 2nd version (blue/black) works the colors in 2 rows allowing you to carry the yarn on the edges of the blanket and not have so many ends to weave in. This version is available in the ad free pdf. The ad free pdf also includes written instructions and a stitch chart for both versions along with a stitch flow chart for Version 2. This is available HERE on my website or continue below for other purchase options. A Scrumptious new year round throw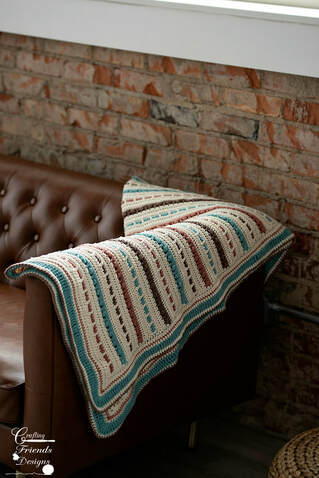 craftingfriendsdesigns.com 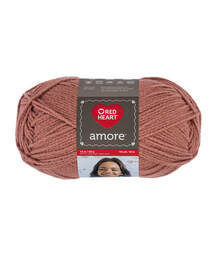 When Red Heart Yarns released their new Amore yarn, I HAD to try it. Just feeling the skein in the store made me clear the shelves (and I'm not joking!). Mind you, the shelves weren't very full of this yarn so I had to keep checking for more each time I went to town. It took some time to get the amount of yarn I wanted for a few different designs but the wait was SO worth it! If you haven't tried Red Heart Amore yet, don't wait any longer. It is so soft and flexible and comfy and feels like butter to work with. ***This post contains Affiliate links through which I may receive a small commission for purchases made at no extra cost to you*** The Wrapped in Ribbon Blanket is great for year round use! Using the Amore yarn, it drapes nicely and is comfy cozy for cool summer evenings. Using other 4ww yarns (as seen below) make this wonderfully warm for winter too. 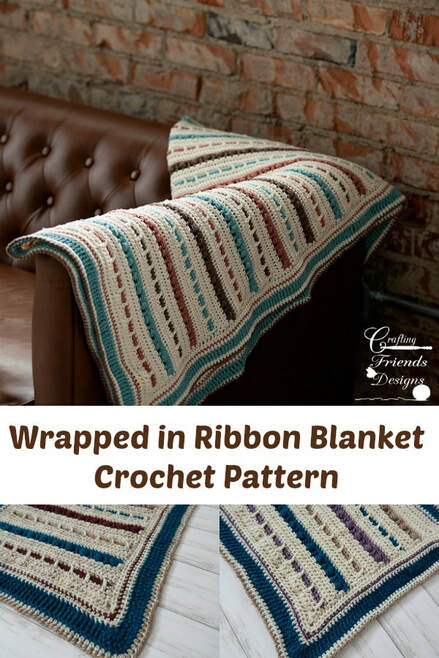 PIN THIS IMAGE Crochet Pattern Supplies and DetailsNew FREE Crochet Pattern Release
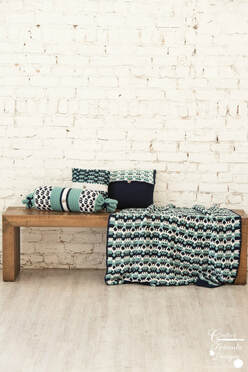
Sea Breeze Home Decor Crochet Pattern Collection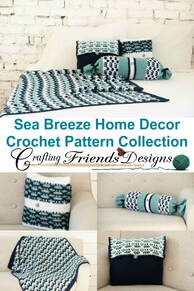
You can find the other coordinating Sea Breeze crochet patterns by clicking on the links below:
Sea Breeze Bolster Pillow - This is available to view for free HERE on my blog or as a pdf instant download HERE Sea Breeze Rectangle Pillow - This pattern is available to view for free HERE on my blog or as a pdf instant download HERE Sea Breeze Throw - This is available in the June 2017 issue of Crochet World Magazine Sea Breeze Square Pillow - Continue below to view the pattern for free OR purchase the ad free pdf which also includes the pillow form instructions HERE Sea Breeze Square Pillow Crochet Pattern
Skill Level: Easy
Terms: US crochet terminology Materials: Bernat Satin 4ww yarn or similar Snow - 200 yards Sage - 87 yards Admiral - 93 yards Yarn Needle Optional button (any size) to accessorize by sewing to center of round 24 Hook Size: I/9-5.50mm Gauge: 13 dc & 7 rows = 4 inches Finished Size: 12” x 12” Stitches: ch - chain, st(s) - stitch(es), sl st - slip stitch, sc - single crochet, dc - double crochet Special Stitches Shell - (2 dc, sl st around ch-5, 2 dc) in indicated stitch Herringbone hdc - yarn over, insert hook in indicated st, yarn over, pull through stitch and first loop on hook, yarn over, pull through remaining 2 loops on hook Foundation hdc - If you are unfamiliar with foundation chains, these tutorials may help Photo tutorial: http://craftingfriendsdesigns.blogspot.com/2014/12/hdc-chainless-foundation.html Video tutorial: https://www.craftingfriendsdesigns.com/bloggingfun/hdc-foundation-chain-video-tutorial Notes:
FREE Pillow Crochet Pattern
Sometimes, just a splash of pattern is all you need. The Sea Breeze Rectangle pillow crochet pattern is the perfect example of that! This pillow is worked from the bottom up with a fun patterned flap that folds over the top. It's easy to remove for washing or swapping out for different colors throughout the year.
This crochet pattern is available to view for FREE here on my blog by continuing on below or you can purchase the ad free pdf instant download HERE. The pdf includes instructions to make your own pillow form too. 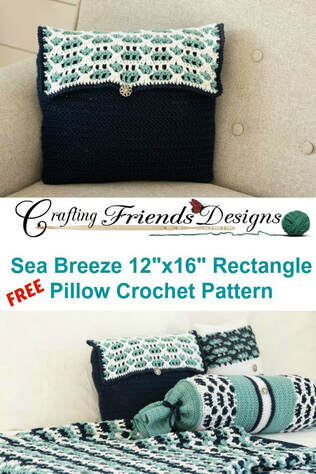
***This post contains affiliate links through which I may receive a small commission for purchases at no extra cost to you***
I don't know about you, but the color of seafoam is so relaxing to me. It brings to mind a beautiful summer day on a sunny beach with waves foaming on the sand. The smell of the fresh water and sound of waves and birds chirping....Ahhhh
Enjoy the refreshing summer breeze in your home with the beautiful Sea Breeze Home Decor crochet pattern collection. Sea Breeze 12" x 16" Retangle Pillow Cover
© 2018 Copyright by Kate Wagstaff of Crafting Friends Designs
© 2018 Photo Copyright Ash & Co It is Illegal to copy, share or upload this pattern to sites for others to access This pattern is not to be used for educational purposes You do have permission to sell finished items you crochet using my patterns You are in no way to alter the pattern and claim it as your own to sell or give to others Email: craftingfriends4you@yahoo.com Facebook: https://www.facebook.com/CraftingFriendsDesigns Etsy: www.etsy.com/shop/CraftingFriendsDesig Ravelry: http://www.ravelry.com/designers/kate-wagstaff
Skill Level: Easy
Terms: US crochet terminology Materials: Bernat Satin 4ww yarn or similar Snow - 42 yards, Sage - 42 yards, Admiral - 360 yards Yarn Needle, Stitch marker, 1 Button (1”) Needle and matching thread (Admiral) Hook Size: I/9-5.50mm & K/10 ½ -6.5 mm Gauge: 13 dc & 7 rows = 4 inches Finished Size: 12” x 16” Stitches: ch - chain, st(s) - stitch(es), sl st - slip stitch, sc - single crochet, dc - double crochet Special Stitches Shell - (2 dc, sl st around ch-5, 2 dc) in indicated stitch Herringbone hdc - yarn over, insert hook in indicated st, yarn over, pull through stitch and first loop on hook, yarn over, pull through remaining 2 loops on hook Foundation hdc - If you are unfamiliar with this foundation chain, view this photo tutorial on my blog Photo tutorial: http://craftingfriendsdesigns.blogspot.com/2014/12/hdc-chainless-foundation.html Video tutorial: https://www.craftingfriendsdesigns.com/bloggingfun/hdc-foundation-chain-video-tutorial Notes:
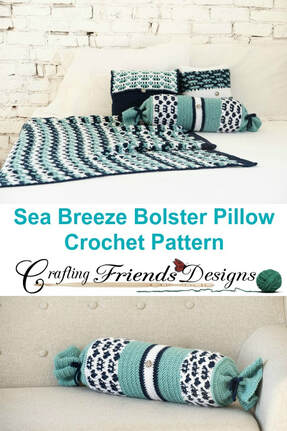
Introducing the new Sea Breeze Bolster Pillow Cover crochet pattern. This is a beautiful and quick project for gifts or to add to your own home decor. The candy wrapper style ends make it easy to swap out for other styles and colors and easy to remove for washing.
This pattern is available to view for FREE here on my blog by continuing below OR you can purchase an ad free pdf for a small fee HERE. The add free pdf includes instructions for a bolster pillow form if you prefer to make your own.  Crochet Pattern, Sea Breeze 6"x16" Bolster Pillow Form and Pillow Cover
***This post contains Affiliate links through which I may receive a small commission for purchases at no extra cost to you***
Sea Breeze Bolster Pillow Cover instructions
© 2018 Copyright by Kate Wagstaff of Crafting Friends Designs
© 2018 Photo Copyright Ash & Co It is Illegal to copy, share or upload this pattern to sites for others to access This pattern is not to be used for educational purposes You do have permission to sell finished items you crochet using my patterns You are in no way to alter the pattern and claim it as your own to sell or give to others Facebook: https://www.facebook.com/CraftingFriendsDesigns Etsy: www.etsy.com/shop/CraftingFriendsDesig Ravelry: http://www.ravelry.com/designers/kate-wagstaff |
Kate WagstaffHey there! Thank you for joining my blog here at Crafting Friends Designs. Grab your hook, some yarn and get comfy as we crochet some fun, unique and beautiful projects together.  Archives
April 2024
 |


 RSS Feed
Proudly powered by Weebly