|
Wrapped in Ribbon Chevron Blanket crochet pattern Well, well, well...
It's time for another new blanket crochet pattern to keep our hooks a hooking! You know how I love texture and I've had a lot of fun creating appliques on blankets that don't have to be sewn in at the end. The Rings of Ribbon Blanket was such a pretty little design that I wanted to use the ribbons in something larger for older girls. The Wrapped in Ribbon Chevron Blanket is still full of fun and texture but not so "Baby-ish" allowing toddlers, children and even teens to snuggle in cuteness!
0 Comments
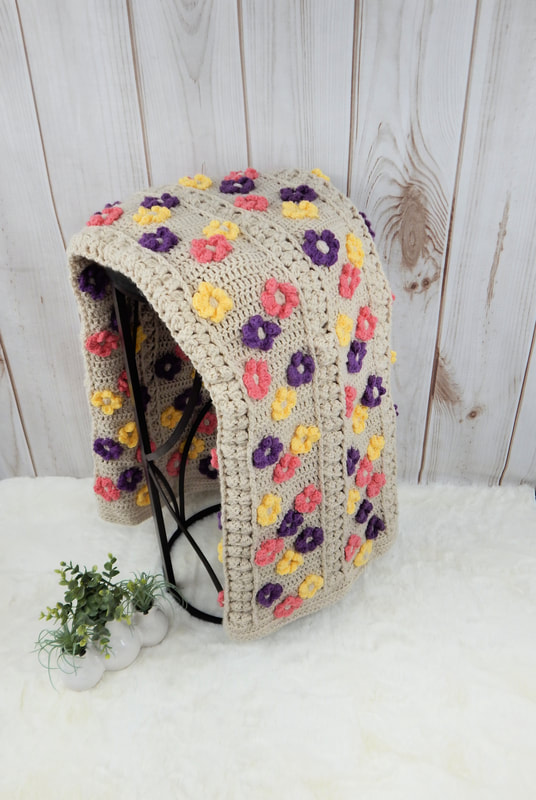 Wild Flower Blanket crochet pattern Introducing the new Wild Flower Blanket crochet pattern I am SO excited to introduce my new Wild Flower Blanket crochet pattern to you! At the age of 16, I began selling the blankets I would make. At the time, I had a goal to make a blanket for every single member of my family. As my siblings started getting married and having kids, this task kept me busy. Blankets are a passion of mine though and I enjoyed every minute of the process and even more when each family member received their gift. It was so fun to see my nieces and nephews snuggle up in their own blanket that I made. As I started designing, a few of them even had a blanket designed specifically with them in mind. My kids outgrew the blankets I made them faster than I wish they would have. I love watching them learn and grow but time goes WAY to fast!!!
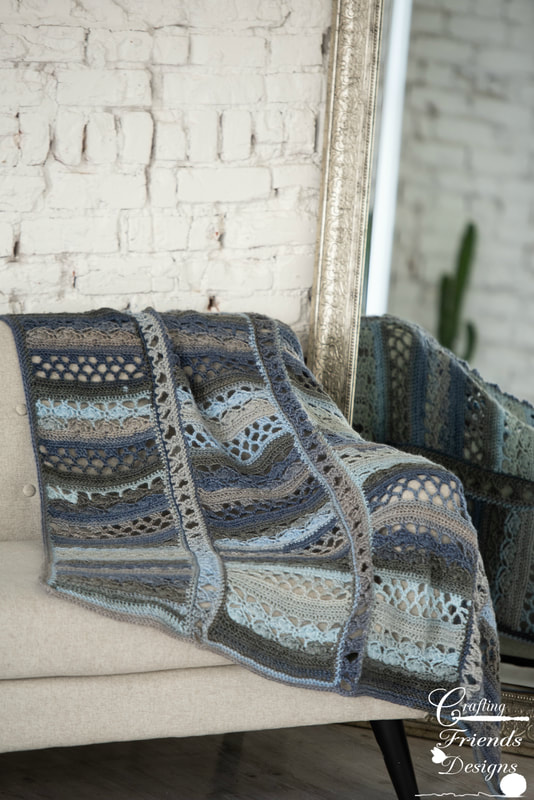
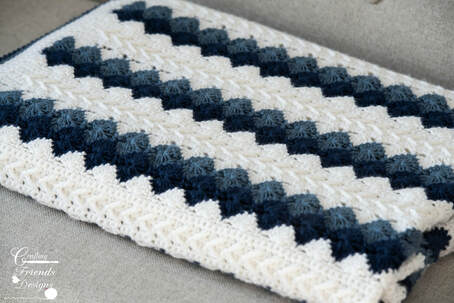
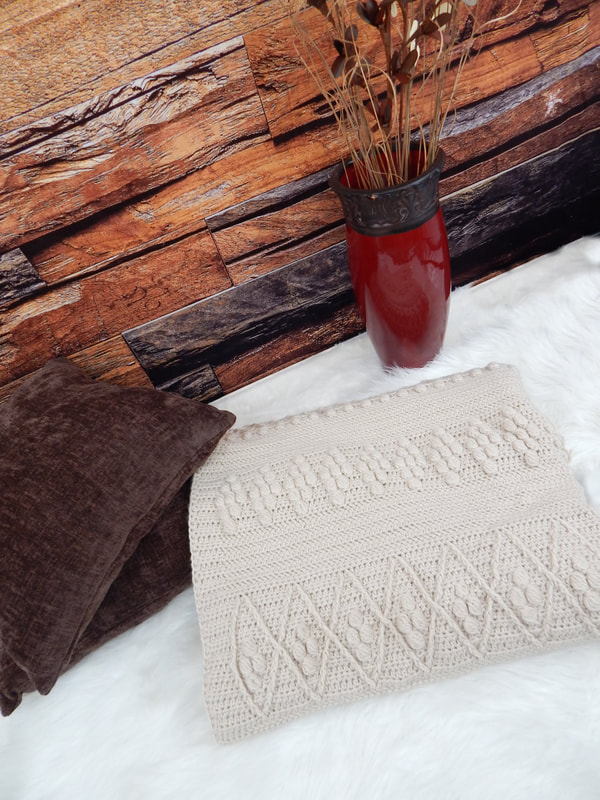
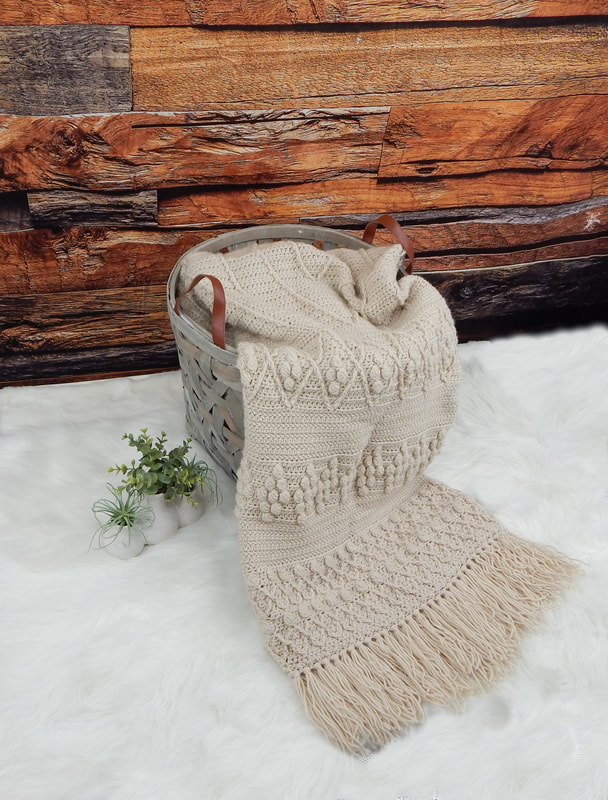
With their growth, it was time to start designing my girls new blankets that would be big enough to last them longer. This Wild Flower Blanket was designed for my youngest. She absolutely loves the outdoors. Over the years, she has taught me to appreciate the simple little things in life. One of my other favorite hobbies is gardening. We have a wide variety of beautiful flowers in our yard and I work hard to keep it looking as pretty and enjoyable as possible. When she was younger, she was constantly picking flowers for me. I would kindly take them but it would frustrate me because I also wanted flowers to be left alone to show outside. My hubby got after me one day and reminded me that she's just picking them to show me she loves me - I know, I really do. It was just a battle of hard work and being able to enjoy the full beauty and taking a step back to appreciate her love for the flowers and me too. It's GREAT to be back! I've sure missed being active with the crochet community over the past 2 years. When I took an office job in 2019, I knew I would miss everyone but I knew I would not give up on designing. It's not as easy to accomplish everything that needs to be done working full time and taking care of my little family but they are my priority so being able to consistently release new designs had to be placed on the back burner. I still had my crochet time late at night when everyone went to bed so I've been able to design a LOT of new blankets and have them ready to start releasing 1 each month. Now that the big projects are out of the way, I'm hoping to design some smaller projects too. My daughter Brooklynn loves the boho style and asked me to design her a boho blanket. After designing the Royal Christmas Tree Skirt (found HERE), I knew I wanted to use some of the stitches from that to create a blanket. I fell in love with the post stitches connected with puff stitches!  She's waited almost a full year to use this blanket and was Thrilled that I finally handed it off to her. I hope that you will enjoy crocheting this Boho Diamond Textured Throw as much as I did and I know that you'll receive Many, Many compliments!
Pattern DetailsSkill Level: Intermediate
Size: 48” x 80” Materials: 2875 yards main blanket 215 yards for fringe (optional) Hook: Size I- 5.5mm Gauge: 13 hdc & 10 Rows = 4” Stitches: ch – chain, st(s) – stitch(es), yo - yarn over, sl st – slip stitch, sl st – slip stitch, hdc - half double crochet, dc – double crochet, tr - treble crochet Special Stitches: (FPdc) Front Post Double Crochet: Yo, insert hook from front to back to front around indicated stitch, yo, pull up a loop (3 loops on hook), yo, pull through 2 loops, yo, pull through remaining 2 loops (FPtr) Front Post Treble Crochet: yo 2x, insert hook from front to back to front around indicated stitch, yo, pull up a loop, (4 loops on hook), [yo, pull through 2 loops on hook]3x (FPdcHdcTog) Front Post Double Crochet Half Double Crochet Together: Yo, insert hook around post of indicated st from front to back to front, yo, pull up a loop, yo, pull through 2 loops on hook, yo, insert hook in top of indicated stitch, yo, pull up a loop, yo, pull through all 4 loops on hook Note: When working in the top of skipped stitches, work behind the front post just worked (FPtrHdcTog) Front Post Treble Hdc Together: Yo 2x, insert hook around post of indicated st from front to back to front, yo, pull up a loop, [yo, pull through 2 loops on hook]2x, yo, insert hook in top of indicated st, yo, pull up a loop, yo, pull though all 4 loops on hook Note: When working in the top of skipped stitches, work behind the front post just worked Bobble Stitch: [Yo, insert hook around post of indicated stitch, yo, pull up a loop, yo, pull through 2 loops on hook]5x, yo, pull through all 6 loops on hook (hhdc) Herringbone Half Double Crochet: Yo, insert hook in indicated stitch, yo, pull through stitch and first loop on hook, yo, pull through remaining 2 loops on hook Notes:
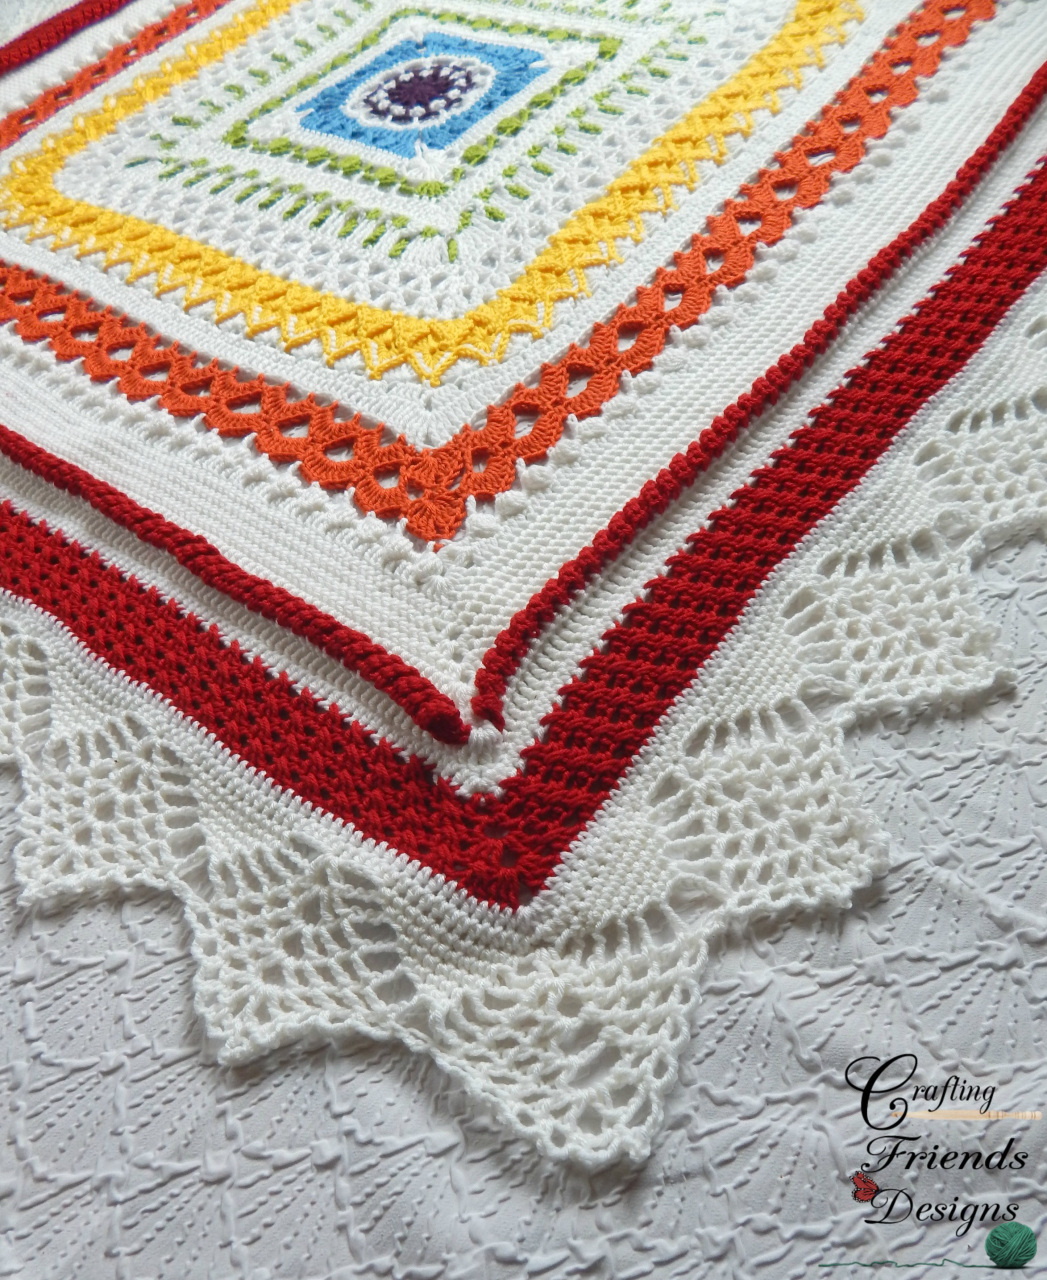
 Crochet pattern details:Clouded Skies Blanket crochet pattern ~ Worked in strips and stitched together with a pretty butterfly chain. This pattern is available on Bluprint as a kit with the yarn included Skill Level: Easy Terms: US Crochet Terminology Materials: 1900 yards Sprightly Spectrum 4ww yarn or similar 16 stitch markers, safety pins or strands of yarn to mark corner stitches of each section Finished Size: 48” x 60” Hook: J/10-6.00mm Gauge: Rows 1-15 = 7” high x 10” wide Stitches/Abbreviations: st(s) - stitch(es), sl st - slip stitch, ch - chain, yo - yarn over, hdc - half double crochet, dc - double crochet Special Stitches: Hdc Foundation Chain: If you’re unfamiliar with how to work foundation chains, this photo tutorial may help: http://craftingfriendsdesigns.blogspot.com/2014/12/hdc-ch... Or a video tutorial is available here: https://www.craftingfriendsdesigns.com/bloggingfun/hdc-fo... Herringbone hdc: Yo, insert hook in indicated st, yo, pull up a loop, pull through 1 loop on hook, yo, Pull through both loops on hook 2 dcCL: yo, insert hook in indicated st, yo, pull up a loop, yo, pull through 2 loops on hook2x, yo, pull through all 3 loops on hook 3 dcCL: yo, insert hook in indicated st, yo, pull up a loop, yo, pull through 2 loops on hook3x, yo, pull through all 4 loops on hook Clouded Skies Blanket crochet pattern available in the following places:Are you ready for a new and unique square blanket crochet pattern?So, here's the deal... ANYONE can take a simple stitch out of a crochet stitch book, make a large swatch of it, call it a blanket and say they designed it. To me, it's not really designing unless you do something extra. Make it unique to you and change things up a little or a lot. If you've followed me very long, you know that I am obsessed with blankets. I absolutely LOVE them! I love creating them, crocheting them, wrapping up in them and gifting them! I have a few simple blanket patterns available that use basic stitches and they're nice to have around. When I see them, they seem comfy and useful but don't bring me joy. I love the challenge of using a variety of stitches that you don't typically see worked together. I want that Ahhh moment when I crochet something amazing. More than that, I want YOU to feel that AHHH moment when you finish crocheting one of my blanket patterns. I want YOU to feel accomplished and feel the joy each time you wrap up in the blanket you made or see the look on a friend's face when they open the gift you made especially for them. **This post contains Affiliate links. I may receive a small commission for purchases made through these links at no extra cost to you.** I've wanted to create a square blanket for quite a while now. I just needed the right yarn/color inspiration and some stitches to speak to me. Months ago, I was strolling the yarn isles at my local JoAnn's store and they had Premier Yarn's Everyday yarn for $2 a skein. I could NOT pass that deal up!!! I filled my cart with some amazing fall colors that I wanted to work and then noticed some baby yarn too. It's been years since I've worked with baby yarn and for this price, I figured I'd bring something to life. I grabbed all the grey, white and pink they had. THIS was going to be adorable no matter how it ended. As I started crocheting my first swatch with these colors, I realized that the pink was a 4ww and not the baby yarn. Darn it! I should have paid attention though I won't complain about another yarn shopping day lol. I set the pink aside for something else and ordered the yellow online. I am thrilled with the change! The Sunny Day Blanket has been a lot of fun to crochet and I've really enjoyed playing with a bunch of beautiful textured stitches . I hope that you'll have fun crocheting this along with me! This is a great blanket to play with color so grab your stash and make it yours. The original is worked in Premier Everyday Baby Yarn #3 in yellow, grey and white. I'm working a 2nd blanket to crochet with you during this Crochet - A - Long using Premier Everyday Antipilling #4ww Yarn in rainbow colors.
Sunny Day Blanket DetailsSkill Level: Intermediate
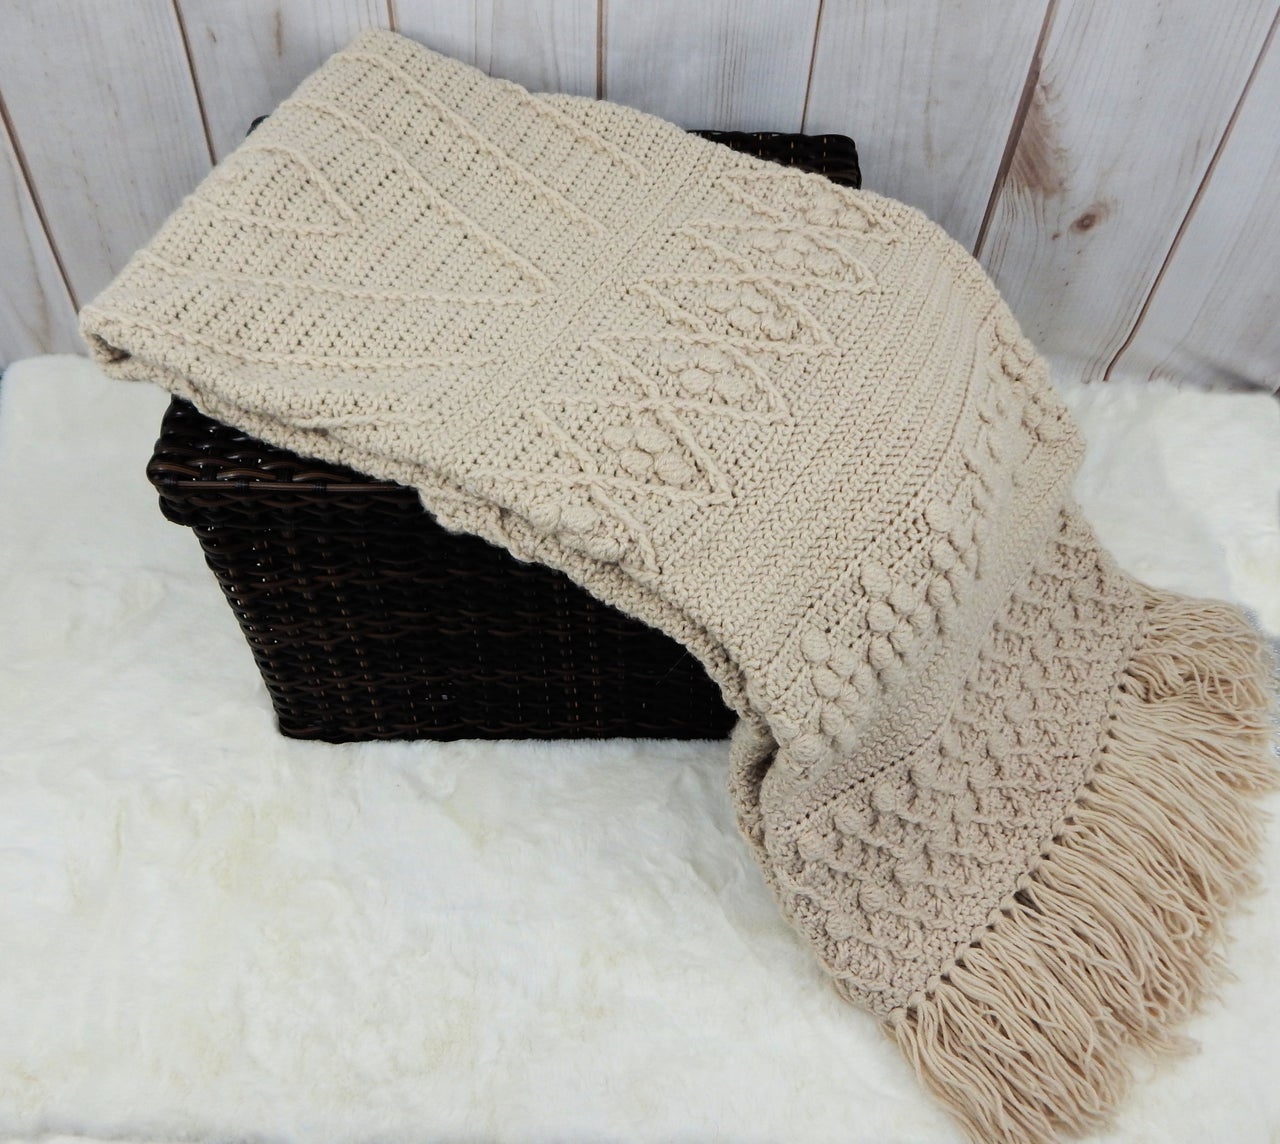
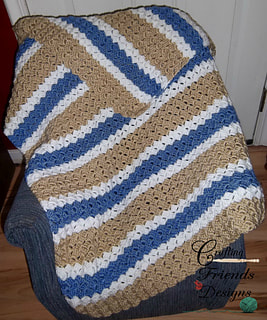
Terms: US Crochet Terminology Materials: 2455 total yards Premier Yarns Everyday Baby #3 DK Light or similar 735 yards Grey 742 yards White 978 yards Yellow Note: Other sizes of yarn may be used though your final size will vary Finished Size: 53” x 53” Hook: G/6-4.25mm Gauge: Checkpoints given throughout pattern Stitches/Abbreviations: st(s) - stitch(es) sl st - slip stitch ch - chain yo - yarn over sc - single crochet hdc - half double crochet dc - double crochet tr - treble crochet A Scrumptious new year round throw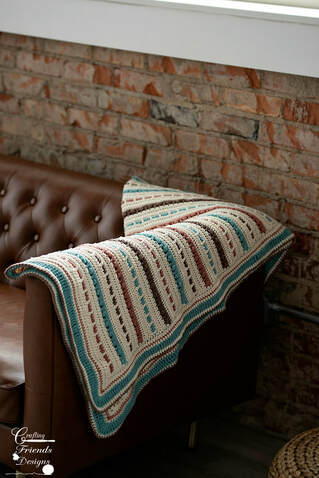 craftingfriendsdesigns.com  When Red Heart Yarns released their new Amore yarn, I HAD to try it. Just feeling the skein in the store made me clear the shelves (and I'm not joking!). Mind you, the shelves weren't very full of this yarn so I had to keep checking for more each time I went to town. It took some time to get the amount of yarn I wanted for a few different designs but the wait was SO worth it! If you haven't tried Red Heart Amore yet, don't wait any longer. It is so soft and flexible and comfy and feels like butter to work with. ***This post contains Affiliate links through which I may receive a small commission for purchases made at no extra cost to you*** The Wrapped in Ribbon Blanket is great for year round use! Using the Amore yarn, it drapes nicely and is comfy cozy for cool summer evenings. Using other 4ww yarns (as seen below) make this wonderfully warm for winter too. 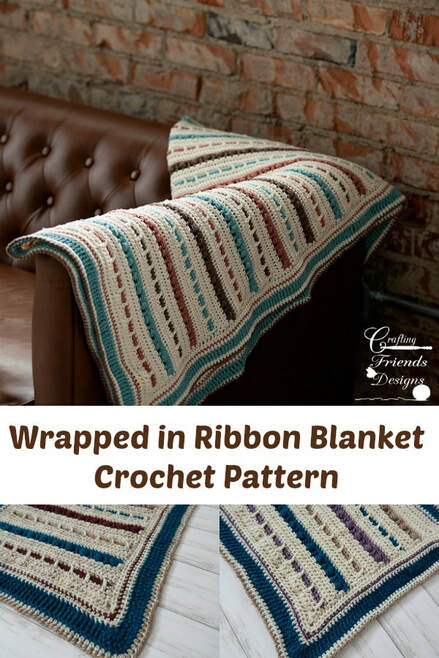 PIN THIS IMAGE Crochet Pattern Supplies and Details
The Traveling Arrows Throw crochet pattern is the final pattern in the Traveling Arrows Home Decor Collection. This crochet pattern is so easy to customize to your desired size making it a must have! You can quickly make a baby blanket for baby shower gifts, enjoy some time crocheting up a throw or if you're really adventurous, you can keep going to make an afghan to cover your bed. The beautiful ripple and texture in this crochet design are a sight to behold. You're sure to be complimented on your work over and over!
***This post contains Affiliate links for which I may receive a small commission for purchases at no extra cost to you***
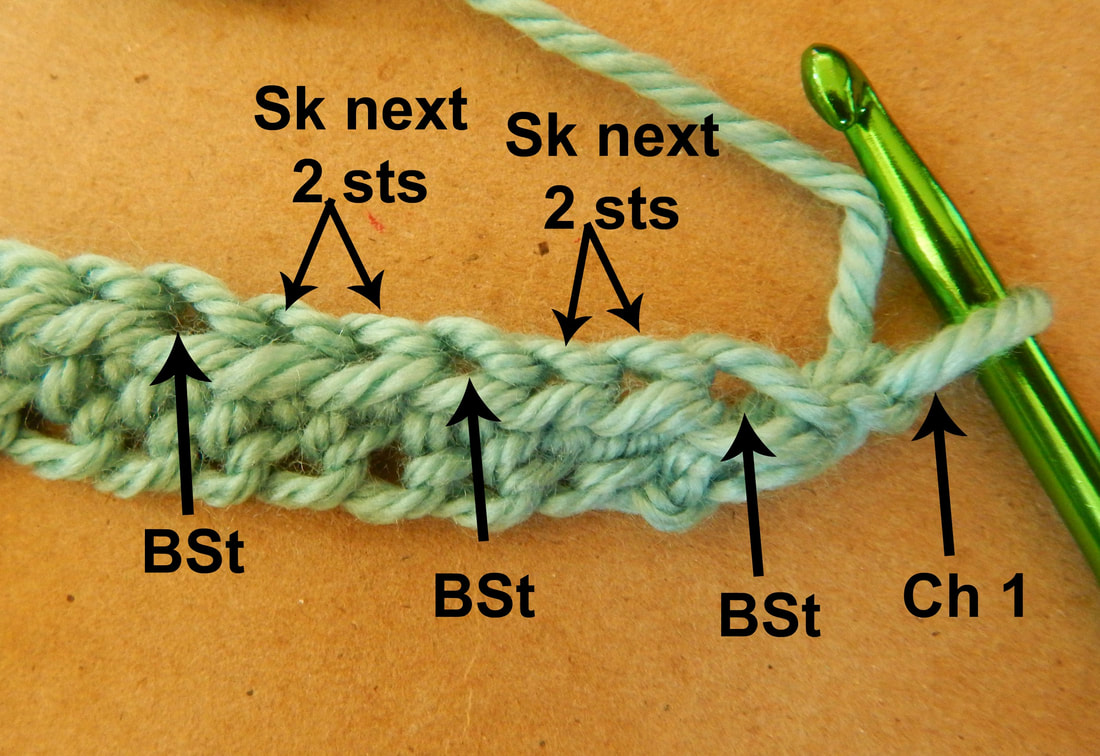
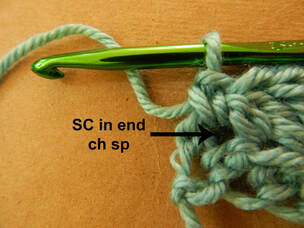
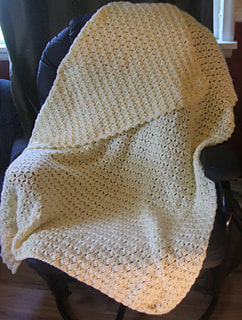
Pattern DetailsDecember's new crochet pattern releases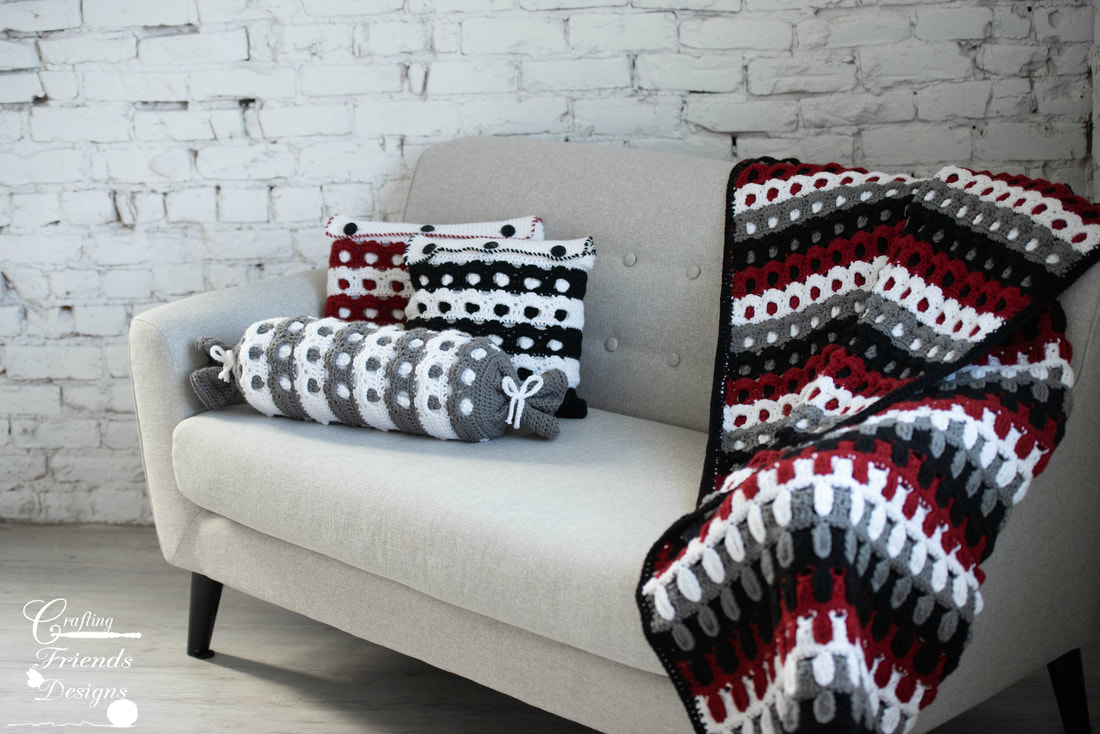 The new Pebbled Archway Reversible home decor crochet pattern collection has quickly become another one of my favorites. I love the feeling you get when you walk in a room and see a comforting afghan placed across a couch. It's even more wonderful with coordinating pillows! What could make it even better? How about all of the pieces being reversible? Each week through the month of December, I'm releasing 1 crochet pattern from this set. The Pebbled Archway Reversible Bolster Pillow crochet pattern was released last week and can be found HERE on my website. This week, is the Pebbled Archway Reversible Throw crochet pattern. This is such a great way to add a splash of color to any room! I hope you'll enjoy laying with color and working up this collection as much as I did. Blanket Supplies and notes:A Quick and Simple Blanket Crochet PatternThe C2C or Corner to Corner blankets are EVERYWERE! The crochet stitch used for this blanket is a fun one to work and is sort of a mindless project stitch. Years and years and years ago (20 or more), I learned this stitch as the Brick Stitch. I've seen it called by other names and I've also seen other stitches called the Brick Stitch. No matter the name you call it, it still works out the same. This blanket is worked from side to side and creates a fun little chevron look when using more than one color. It's easy to work to the size you want which means you're not limited to just a baby blanket or throw size. Make it yours! Have fun with colors and enjoy some crochet time!  To view the pattern for free, continue below. To purchase the AD FREE pdf, click HERE or find links to my other shops at the bottom of this post Brick Stitch Blanket InstructionsSkill Level: Easy Terms: US Crochet Terminology Materials: 1575 yards Medium 4ww yarn Finished Size: 3’x3’ or Customizable Hook: I/9-5.50mm Gauge: 6 dc & 3 rows = 2” Stitches/Abbreviations: st(s) - stitch(es), sl st - slip stitch, ch - chain, yo - yarn over, sc - single crochet, dc - double crochet Special Stitches: Hdc Foundation Chain: If you’re unfamiliar with foundation chains, these tutorials may help Photo: http://craftingfriendsdesigns.blogspot.com/2014/12/hdc-chainless-foundation.html Video: https://www.craftingfriendsdesigns.com/bloggingfun/hdc-foundation-chain-video-tutorial Brick Stitch (BSt): (sc, ch 2, 3 dc) in same stitch (see Photo 1) Reverse Single Crochet: Insert hook in previous stitch to the right, yo, pull up a loop, yo, pull through both loops on hook Note: If changing colors, do so in the last step of the last stitch of the row before the color change 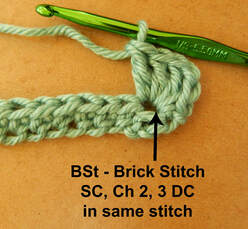 Photo 1 Row 1: Hdc Foundation Chain in multiples of 3 + 1 to desired width/length (a chain of 73 is about 24” with 1 Brick Stitch = 1”) Row 2: Ch 1, turn, *BSt in next st, skip next 2 sts,* repeat from *to* across to end st, sc in end chain (see Photos 2 & 3)
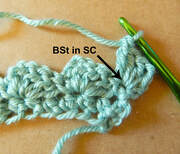
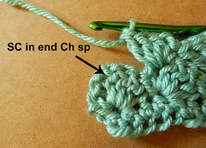
Row 3: Ch 1, turn, BSt in next sc, BSt around ch-2 of each BSt across to end BSt, sc around ch-2 of end BSt (see Photos 4, 5 & 6) Repeat row 3 until you reach your desired length
When you reach the height you prefer, complete the following: End 3 Rows:
If you enjoyed working this pattern and would like to purchase the pdf to save for your convenience, you can find it in my other shops here:
|
Kate WagstaffHey there! Thank you for joining my blog here at Crafting Friends Designs. Grab your hook, some yarn and get comfy as we crochet some fun, unique and beautiful projects together.  Archives
April 2024
 |


 RSS Feed
Proudly powered by Weebly