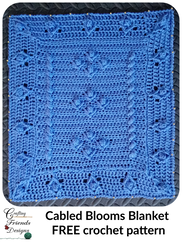
Welcome to the MCAL for the Cabled Blooms Blanket!
 A few words of encouragement before we start. The skill level for this crochet pattern is considered intermediate because of the use of post stitches and a few other stitches that a beginner may not be familiar with. I will be adding photo & video tutorials to help with those stitches so don't be afraid to try it out! It never hurts to try. While I used Yarnspirations Caron Simply Soft Yarn for my pattern swatch, I will be using Premier Yarn's Everyday yarn for my full blanket. It's all about the color for me and it's ok to use something different. This pattern will work well using a variety of yarns. If you enjoy working with thread, consider working 1 section wide of the instructions to create a stunning table runner. If you enjoy working with baby yarn, go for it! If Red Heart Super Saver is your go to, go right ahead! The size of your finished project will vary from mine but that's ok. I'll be giving you instructions to work as close to your desired size as you can. ***This post contains Affiliate links through which I may receive a small commission for purchases at no extra cost to you*** 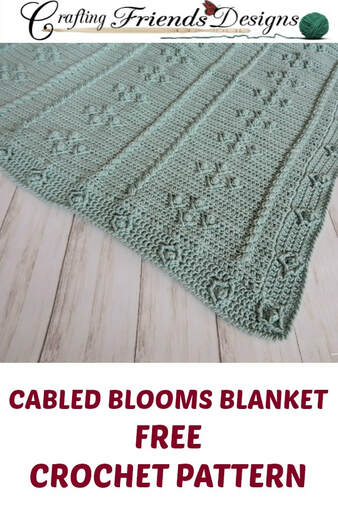
Pattern DetailsSkill Level: Intermediate Terms: US Crochet Terminology Materials: 4 stitch markers 4ww Caron Simply Soft yarn or similar 15.5” x 15.5” (231 yards), 26” x 31” (775 yards), 36.5” x 36.5” (1281 yards), 47” x 47” (2124 yards), 47” x 60” (2712 yards), 57.5” x 60” (3318 yards) Finished Size: 36.5” width x 37” height or Customizable Hook: H/8-5.00mm Gauge:13 hdc & 13 rows = 4” Stitches/Abbreviations: st(s) - stitch(es), sl st - slip stitch, ch - chain, yo - yarn over, hdc - half double crochet, dc - double crochet Special Stitches: Hdc Foundation Chain: If you’re unfamiliar with how to work foundation chains, this photo tutorial may help http://craftingfriendsdesigns.blogspot.com/2014/12/hdc-chainless-foundation.html OR a video tutorial is available HERE Front Post Double Crochet (FPdc): Yo, insert hook from front to back to front around indicated st, pull up a loop, [yo, pull through 2 loops on hook]2x Front Post Double Crochet Cluster (FPdcCL): *Yo, insert hook from front to back to front around post of indicated st, yo, pull up a loop, yo, pull through 2 loops on hook,* repeat from *to* 2x, yo, pull through all 4 loops on hook, remember NOT to work in top of the hdc behind FPdcCL Video tutorials for this stitch are available HERE Front Post Treble Crochet (FPtr): Yo twice, working in front of previous row, insert hook from front to back to front around post of indicated st, yo, pull up a loop (4 loops on hook), (yo, pull through 2 loops on hook)3x, skip st behind FPtr Partial Front Post Treble Crochet (Partial FPtr): Yo twice, insert hook from front to back to front around post of indicated st, yo, pull up a loop, [yo, pull through 2 loops on hook]2x Partial Front Post Double Treble crochet (Partial FPdtr): Yo three times, insert hook from front to back to front around post of indicated st, yo, pull up a loop, [yo, pull through 2 loops on hook]3x Popcorn Stitch (uses one hdc): 5 hdc in indicated st, drop loop from hook, insert hook from front to back in first hdc of 5-hdc group, hook dropped loop and draw through st Video Tutorial for this stitch available HERE Notes:
2. Border section adds 2.5” to each side of blanket Crochet Pattern InstructionsRow 1: Work a hdc foundation chain of 99 or to customize work in multiples of 33 to desired width If you prefer to work a basic starting chain, chain the amount required + 2, turn, hdc in 2nd chain from hook and each chain across Note: Each section requires 33 stitches and is 10.5” if matching my gauge + the border adds 5” Example: 33 sts = 15.5” total width, 66 sts = 26” total width, 99 sts = 36.5” total width, 132 sts = 47” total width  Rows 2-4: Turn, hdc in each st across Row 5: Turn, *hdc in next 3 sts, skip next st, FPdcCL around hdc one row below next st, hdc in next 10 sts, working 2 rows below, skip next 2 sts, FPtr around next st (2 rows below), hdc in next st, popcorn st in next st, hdc in next st, FPtr around same st as last FPtr made, hdc in next 10 sts, FPdcCL around st 2 rows below hdc just made, hdc in next 3 sts,* repeat from *to* across A video tutorial for the popcorn stitch in this row can be found HERE Video tutorials for the FPdcCL's can be found HERE Row 6: Turn, hdc in each st across Row 7: Turn, *hdc in next 3 sts, skip next st, FPdcCL around hdc one row below next st (this will be the stitch directly after the previous FPdcCL), hdc in next 6 sts, working 2 rows below, skip next 2 sts, FPtr around next st (2 rows below), hdc in next st, popcorn st in next st, hdc in next st, FPtr around same st as last FPtr made, hdc in next 3 sts, working 2 rows below, skip next 2 sts, FPtr around next st (2 rows below), hdc in next st, popcorn st in next st, hdc in next st, FPtr around same st as last FPtr made, hdc in next 6 sts, FPdcCL around st 2 rows below hdc just made (this will be the stitch directly before the previous FPdcCL), hdc in next 3 sts,* repeat from *to* across Row 8: Turn, hdc in each st across
Row 9: Turn, *hdc in next 3 sts, skip next st, FPdcCL around hdc one row below next st (this will be the stitch directly after the previous FPdcCL), hdc in next 10 sts, working 2 rows below, skip next 2 sts, FPtr around next st (2 rows below), hdc in next st, popcorn st in next st, hdc in next st, FPtr around same st as last FPtr made, hdc in next 10 sts, FPdcCL around st 2 rows below hdc just made (this will be the stitch directly before the previous FPdcCL), hdc in next 3 sts,* repeat from *to* across Row 10: Turn, hdc in each st across Row 11: Turn, hdc in next 3 sts, skip next st, FPdcCL around hdc one row below next st (this will be the stitch directly after the previous FPdcCL), hdc in next 25 sts, FPdcCL around st 2 rows below hdc just made (this will be the stitch directly before the previous FPdcCL), hdc in next 3 sts,* repeat from *to* across Row 12: Turn, hdc in each st across Row 13: Turn, hdc in next 3 sts, skip next st, FPdcCL around hdc one row below next st (this will be the stitch directly after the previous FPdcCL), hdc in next 25 sts, FPdcCL around st 2 rows below hdc just made (this will be the stitch directly before the previous FPdcCL), hdc in next 3 sts,* repeat from *to* across Row 14: Turn, hdc in each st across Rows 15-84: Repeat rows 5-14 or continue repeating rows 5-14 to desired height Rows 85-89: Repeat rows 5-9 Rows 90-92: Turn, hdc in each st across Border Rounds Round 1: Turn, sc in each st across to corner stitch, work 2 sc in this corner st and place a stitch marker in sc just made, rotate to work down first side of blanket, sc evenly in multiples of 11 to bottom corner st (write down how many multiples of 11 you worked on this side so you can work the same amount on the opposite side), sc in corner st and place a stitch marker around it, rotate to work across bottom of foundation row, sc evenly in multiples of 11 across foundation to next corner (this should be the same # sts as your foundation chain), sc in corner st and place a stitch marker in it, rotate to work up next side of blanket, sc evenly in multiples of 11 to top corner, sc in same st as beginning sc and place a stitch marker in sc just made, sl st to beginning sc to connect Round 2: Ch 3 (counts as dc), do not turn, dc in next st and each st across to corner st, work 5 dc in corner st, remove stitch marker from previous round and place it around 3rd dc just worked, *rotate to work next side of blanket, dc in each st to next corner, work 5 dc in corner st, remove stitch marker from previous round and place it around 3rd dc just worked,* repeat from *to* 2x, sl st to beginning ch-3 to connect Round 3: Ch 3 (counts as dc), do not turn, dc in next 2 sts, skip next 2 sts, FPtr around next st, dc in 2nd skipped st, dc in next 2 sts, FPtr into same st as previous FPtr, dc in next 3 sts, *dc in next 3 sts, skip next 2 sts, FPtr around next st, dc in 2nd skipped st, dc in next 2 sts, FPtr into same st as previous FPtr, dc in next 3 sts,* repeat from *to* across to end 2 sts before corner st, dc in next 2 sts, (FPdc, 3 dc, FPdc) in corner st, remove stitch marker and place it around 2nd dc just worked, [dc in next 2 sts, repeat from *to* to end 2 sts before next corner st, dc in next 2 sts, (FPdc, 3 dc, FPdc) in corner st, remove stitch marker and place it around 3rd dc just worked,]3x, dc in next 2 sts, sl st to beginning ch-3 to connect Border Round 3 side stitch placement Border Round 3 corner st placement Round 4: Ch 3 (counts as dc), do not turn, dc in next 2 sts, FPdc around next st, skip st behind FPdc just made, dc in next st, Popcorn st in next st, dc in next st, FPdc around next st, skip st behind FPdc just made, dc in next 3 sts, *dc in next 3 sts, FPdc around next st, skip st behind FPdc just made, dc in next st, Popcorn st in next st, dc in next st, FPdc around next st, skip st behind FPdc just made, dc in next 3 sts,* repeat from *to* to end 2 stitches before FPdc of next corner, dc in next 2 sts, FPdc around next FPdc, skip st behind FPdc just made, dc in next st, (dc, Popcorn st, dc) in corner st, remove stitch marker, dc in next st, FPdc around next FPdc, skip st behind FPdc just made, [dc in next 2 sts, repeat from *to* to end 2 sts before FPdc of next corner, dc in next 2 sts, FPdc around next FPdc, skip st behind FPdc just made, dc in next st, (dc, Popcorn st, dc) in corner st, remove stitch marker, dc in next st, FPdc around next FPdc, skip st behind FPdc just made, dc in next 2 sts,]3x sl st to beginning ch-3 to connect Border Round 4 stitch placement Border Round 4 Corner st placement Round 5: Ch 3 (counts as dc), do not turn, dc in next 4 sts, Partial FPtr around FPdc before Popcorn st, Partial FPtr around next FPdc, yo, pull through all 3 loops on hook, skip Popcorn st, dc in next 10 sts, *Partial FPtr around FPdc before Popcorn st, Partial FPtr around next FPdc, yo, pull through all 3 loops on hook, skip Popcorn st, dc in next 10 sts,* [repeat from *to* to next corner Popcorn st, 2 dc in Popcorn st, Partial Fpdtr around FPdc before Popcorn st, Partial FPdtr around next FPdc, 2 dc in same corner Popcorn st, dc in next 10 sts,]3x, repeat from *to* to next corner Popcorn st, 2 dc in Popcorn st, Partial Fpdtr around FPdc before Popcorn st, Partial FPdtr around next FPdc, 2 dc in same corner Popcorn st, dc in next 5 sts, sl st to beginning ch-3 to connect Round 6: Ch 1, reverse sc in each st around, sl st to beginning st to connect Fasten off and weave in ends Border Round 5 st placement I hope you've enjoyed crocheting the Cabled Blooms Blanket. I would love to see photos of your finished projects. Please feel free to share a photo of your blanket in my Facebook Group or email me at craftingfriends4you@yahoo.com and let me know if I can share your photos on my Facebook page. Thanks for joining me! Kate 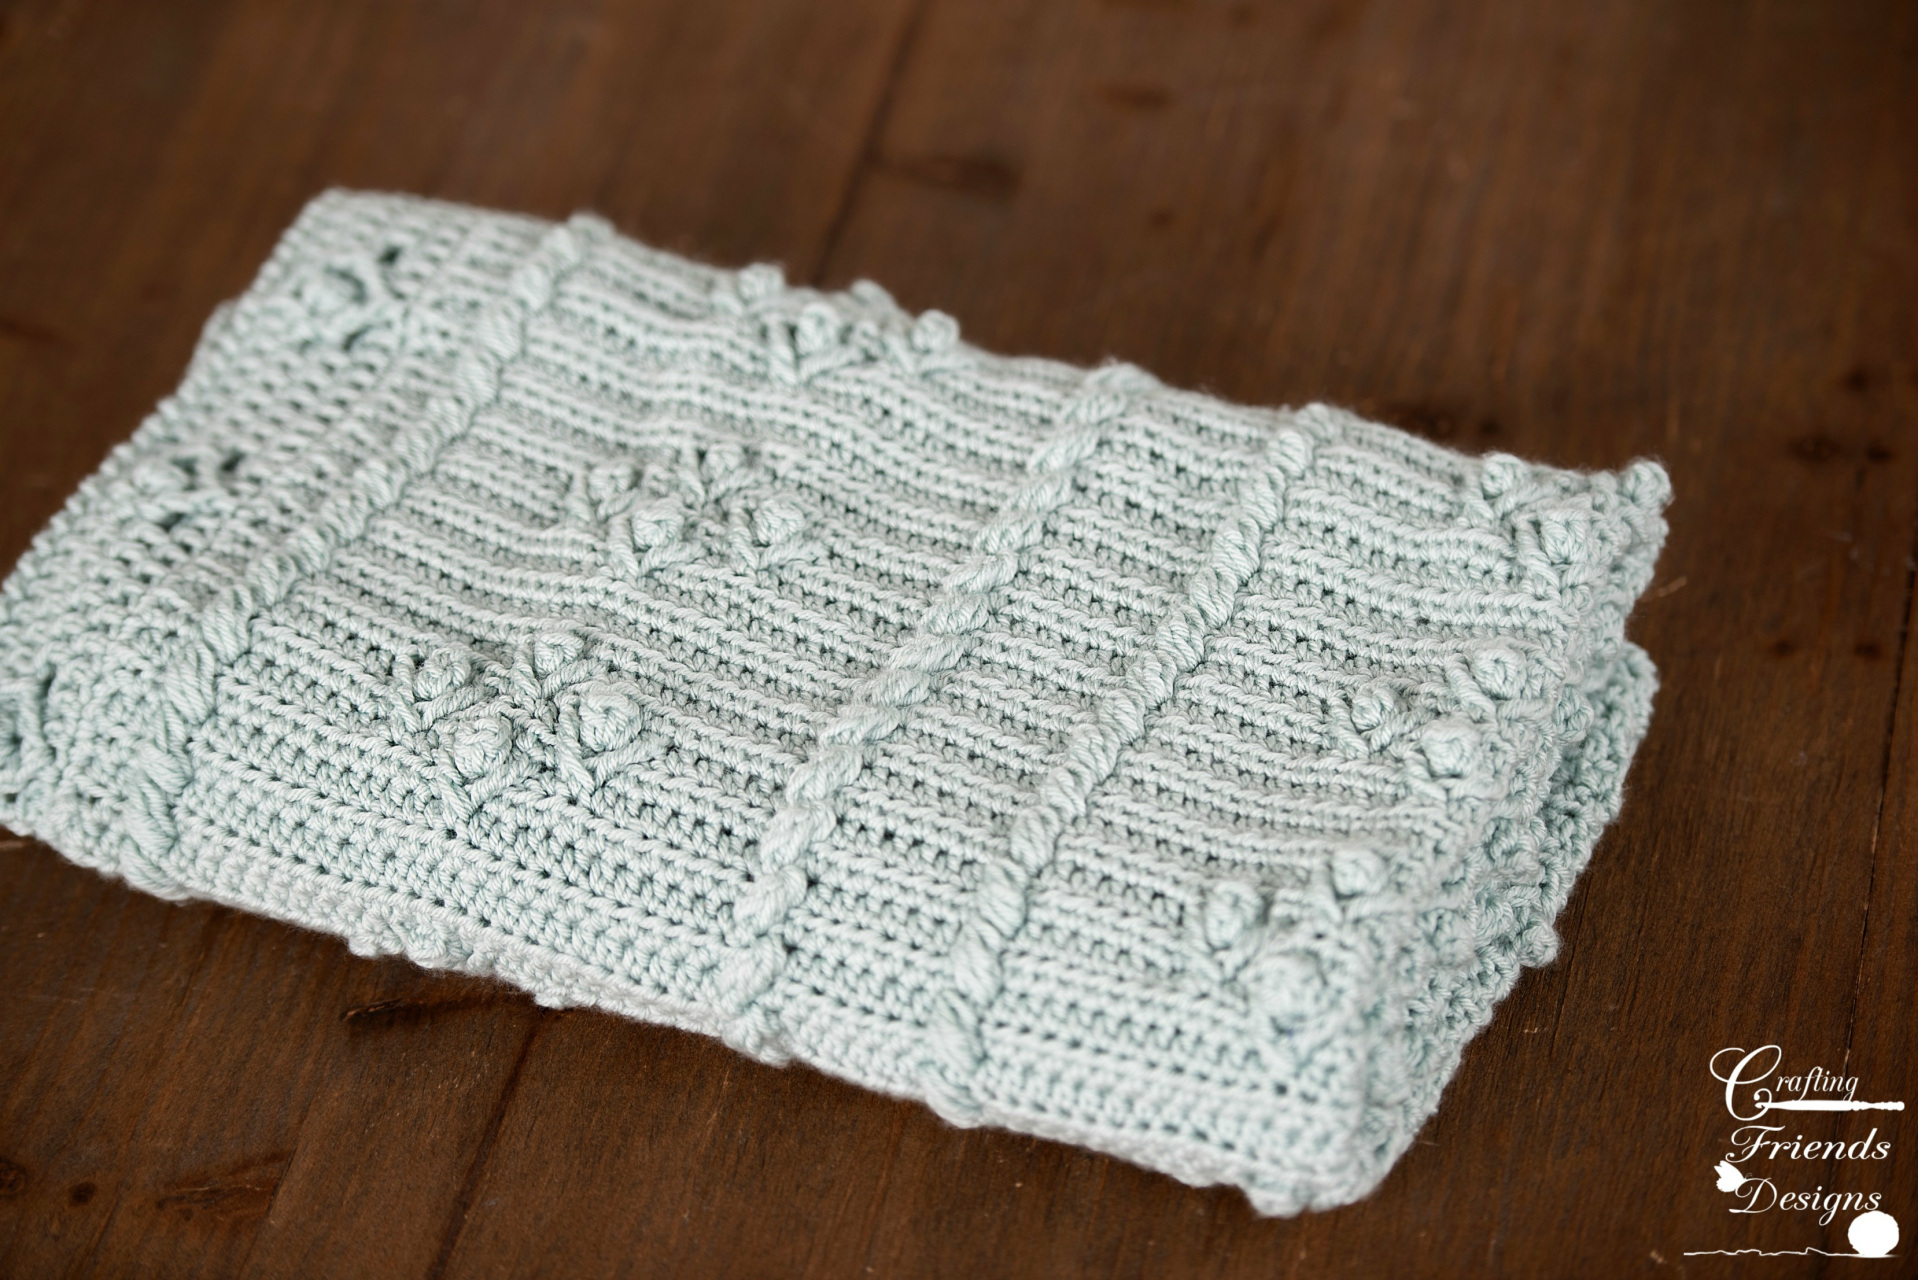 Crochet Pattern, Cabled Blooms BlanketYou may also enjoy these crochet patterns:
0 Comments
Your comment will be posted after it is approved.
Leave a Reply. |

Kate WagstaffHey there! Thank you for joining my blog here at Crafting Friends Designs. Grab your hook, some yarn and get comfy as we crochet some fun, unique and beautiful projects together.  Archives
April 2024
 |

 RSS Feed
Proudly powered by Weebly